Cloudflare R2 GUI — Chrome Dashboard for Buckets & Objects
Manage Cloudflare R2 at speed
Title: Cloudflare R2 GUI — Chrome Dashboard for Buckets & Objects
URL Source: https://r2dashboard.thesignalwise.com/
Markdown Content: Manage Cloudflare R2 at speed
Multi-account, buckets, uploads/downloads, snapshots — all in your browser.
Multi‑account Scheduled sync Snapshot analytics File management

Multi-account
Add and manage multiple Cloudflare accounts with ease.
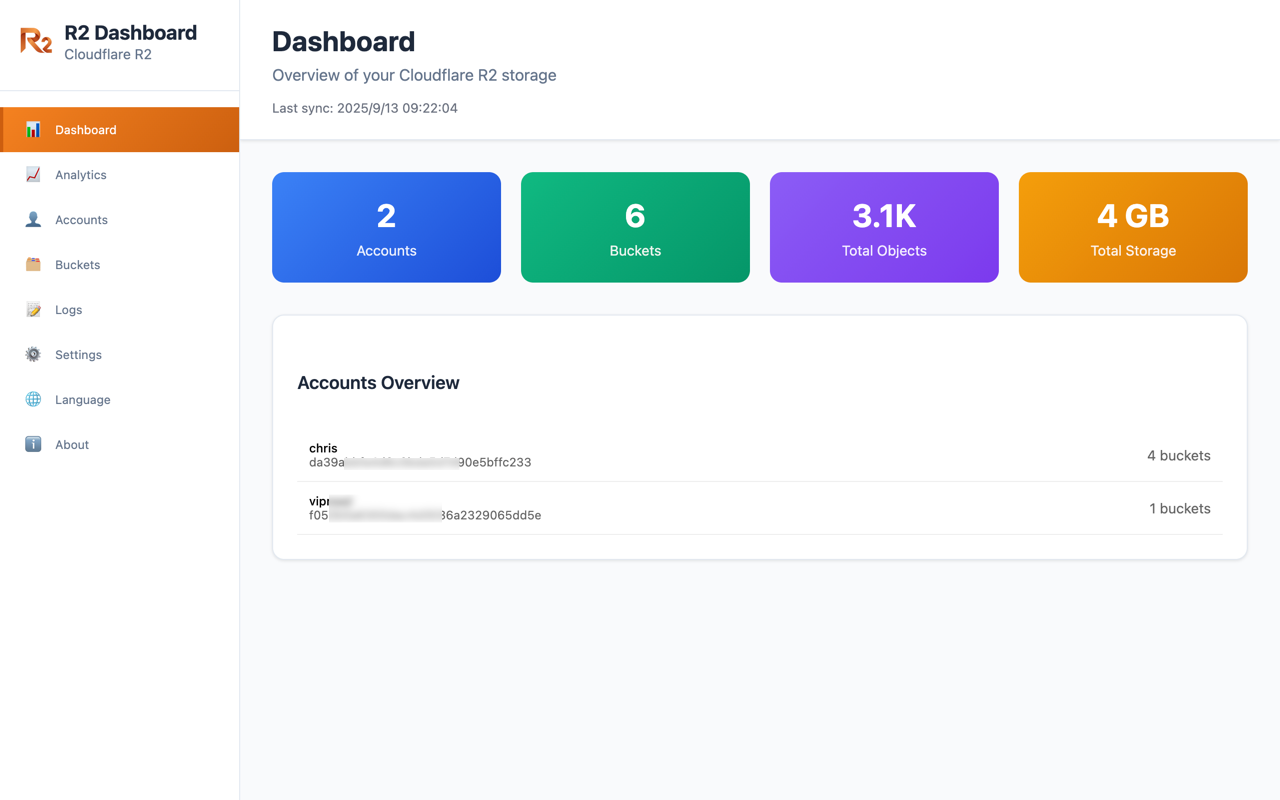
Buckets & stats
Browse buckets with object counts, size and last sync.
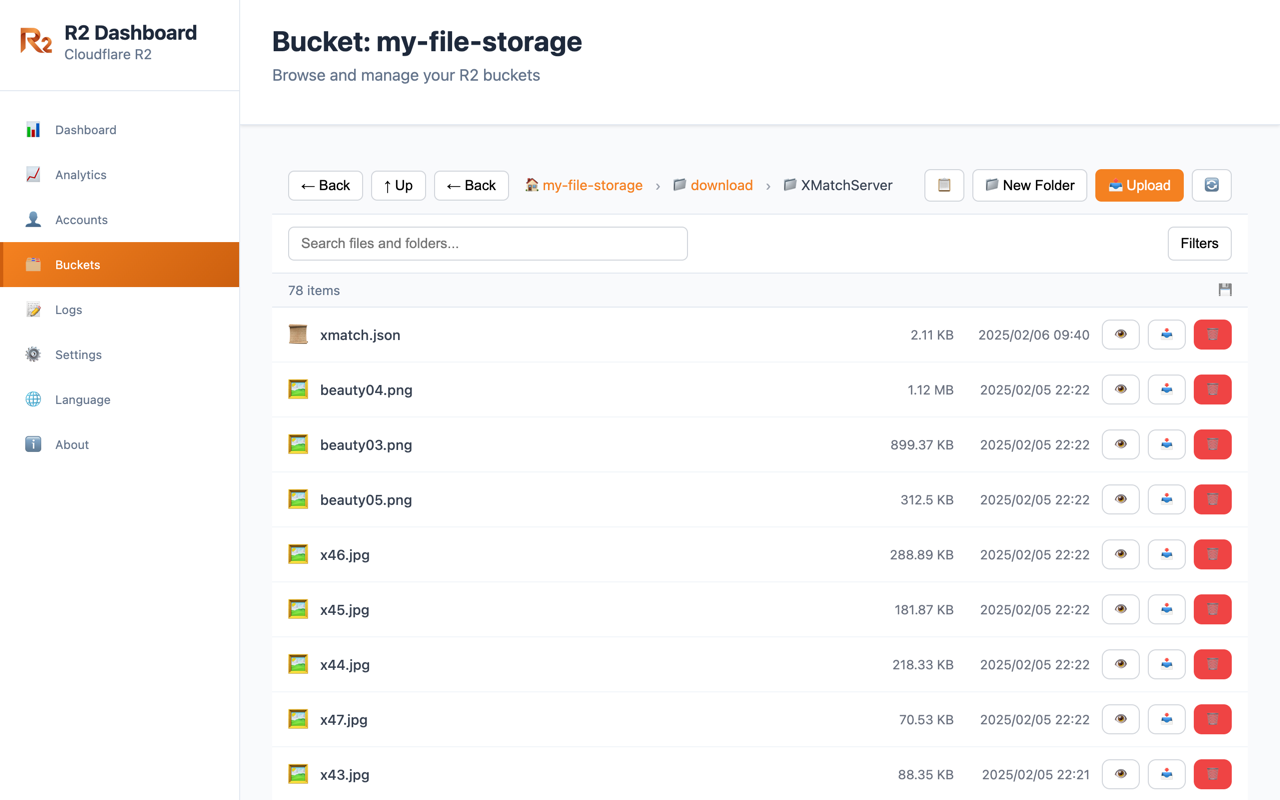
Objects & search
Filter, preview, rename, delete and create folders.
Upload & download
Upload files and download via secure presigned URLs.
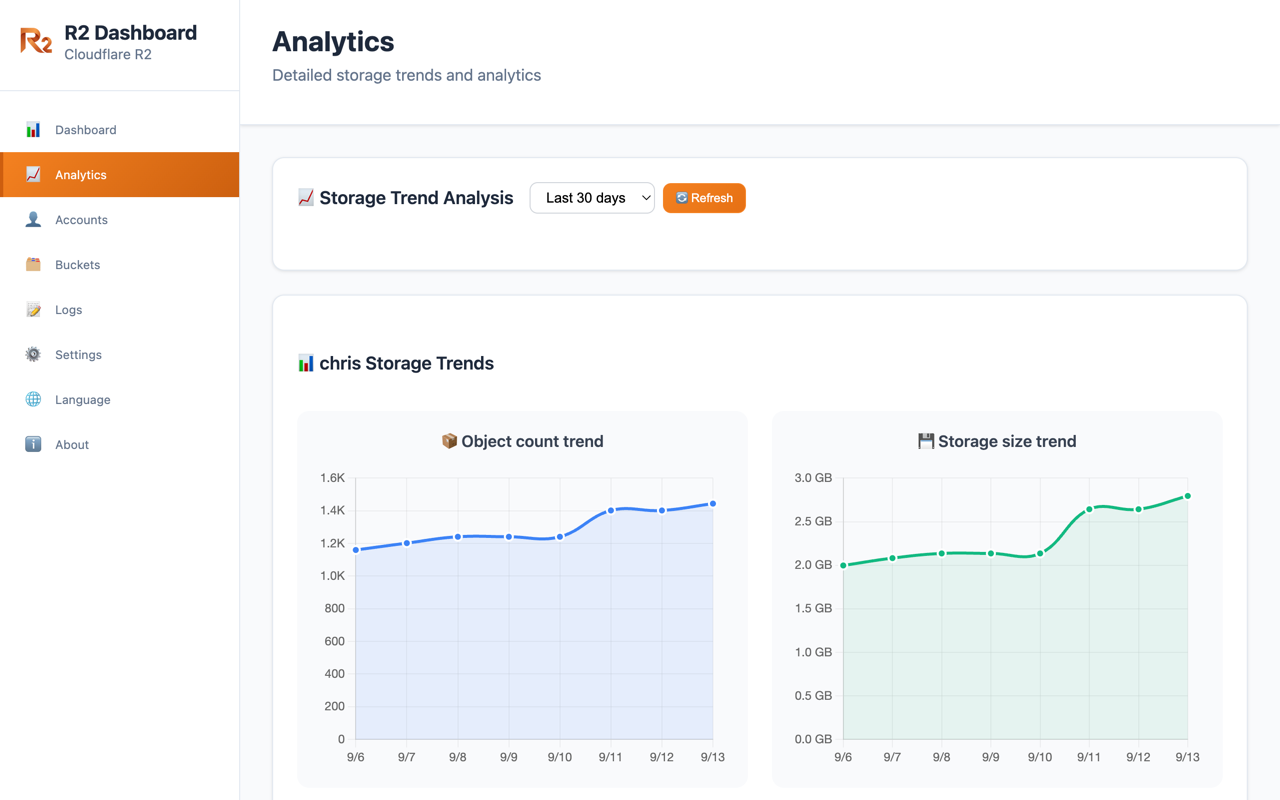
Snapshots & charts
Hourly sync and daily summaries to visualize trends.
Reliable in MV3
Offscreen DOMParser for large S3 XML listings.
A peek at the experience
Cloudflare R2 Dashboard Setup
R2 Dashboard requires two types of credentials: (1) API Token for listing buckets via Cloudflare API, and (2) S3 Access Keys for object operations. Both are created together in one step.
Step-by-Step Instructions
- Navigate to Cloudflare Dashboard → R2 → Manage R2 API Tokens, or directly visit:
https://dash.cloudflare.com/<your-account-id>/r2/api-tokens - Click "Create API Token". IMPORTANT: Choose "Account API Tokens" section (NOT "User API Tokens"). Account tokens remain active even if you leave the organization.
- Enter token name (e.g.,
R2 Dashboard), select "Admin Read & Write" permission, and choose "Apply to all buckets". - After creation, you'll see THREE credentials on one screen: API Token, Access Key ID, and Secret Access Key. Copy all three and paste them into the extension's "Add New Account" form.
Least Privilege (Optional)
For Enhanced Security:
- Create two separate tokens: one with "Admin Read only" for listing buckets, another with "Object Read & Write" for file operations.
- If you only need analytics without upload/delete, create a read-only token.
Note: For most users, a single "Admin Read & Write" token is sufficient and easier to manage.
R2 Dashboard 需要两种凭证:(1)API Token 用于通过 Cloudflare API 列出存储桶,(2)S3 Access Keys 用于对象操作。这两种凭证在同一步骤中一起创建。
详细操作步骤
- 进入 Cloudflare 控制台 → R2 → 管理 R2 API Tokens,或直接访问:
https://dash.cloudflare.com/<你的账号ID>/r2/api-tokens - 点击 "Create API Token" 按钮。重要提示:选择**「Account API Tokens」**区域(不要选「User API Tokens」)。Account token 即使离开组织也保持有效。
- 输入 token 名称(例如
R2 Dashboard),选择 「Admin Read & Write」权限,选择「Apply to all buckets」。 - 创建成功后,会在同一个页面显示三个凭证:API Token、Access Key ID、Secret Access Key。将这三个凭证全部复制,填入扩展的"添加新账号"表单中。
最小权限建议(可选)
增强安全性:
- 可创建两个独立 token:一个使用「Admin Read only」权限用于列出存储桶,另一个使用「Object Read & Write」权限用于文件操作。
- 如果只需要统计分析和浏览,不需要上传/删除功能,可以创建只读 token。
**注意:**对于大多数用户,单个「Admin Read & Write」token 就足够了,且更易于管理。